

[fusion_text]
The choice and selection of Hasselblad bodies is complex and bewildering. Where to start?
Hasselblad made their V-System camera over a 50 year period, and they are fully interchangeable. This means that you can use a body made in 1959 with a lens that was made as recently as 2009, and it will work perfectly.
What to Consider?
Firstly, we should remember that the camera body is simply a light tight box that connects the lens to the film back. Barring it being faulty, or having a reflective interior, it will have no impact on the photograph. Though, it will provide the photographer with control and confidence that will translate through to the final image.
There are a few main things to consider when choosing a body:
- Condition – The cameras were designed and engineered for professional use. This means that they will stand up to daily use for years on end. And some have!
- What extra features are needed – the later and more complex cameras have additional features. Are these useful to you?
- Viewing screen – this is the plastic screen that sits on top of the camera. The lens projects an image onto it, and what you look at when peering through a prism or down through a waist level finder.
Condition
Hasselblads are very durable cameras. Many have seen decades of use and are still working just fine. A well maintained camera can continue to work for many more years to come.Signs that a camera has not been looked after are: dirt, fungus and corrosion; dents and impact damage; rear flaps that do not open/close correctly.
Condition is much more important than age. A well looked after body from 1960, can give you greater reliability than an abused example from 1980.
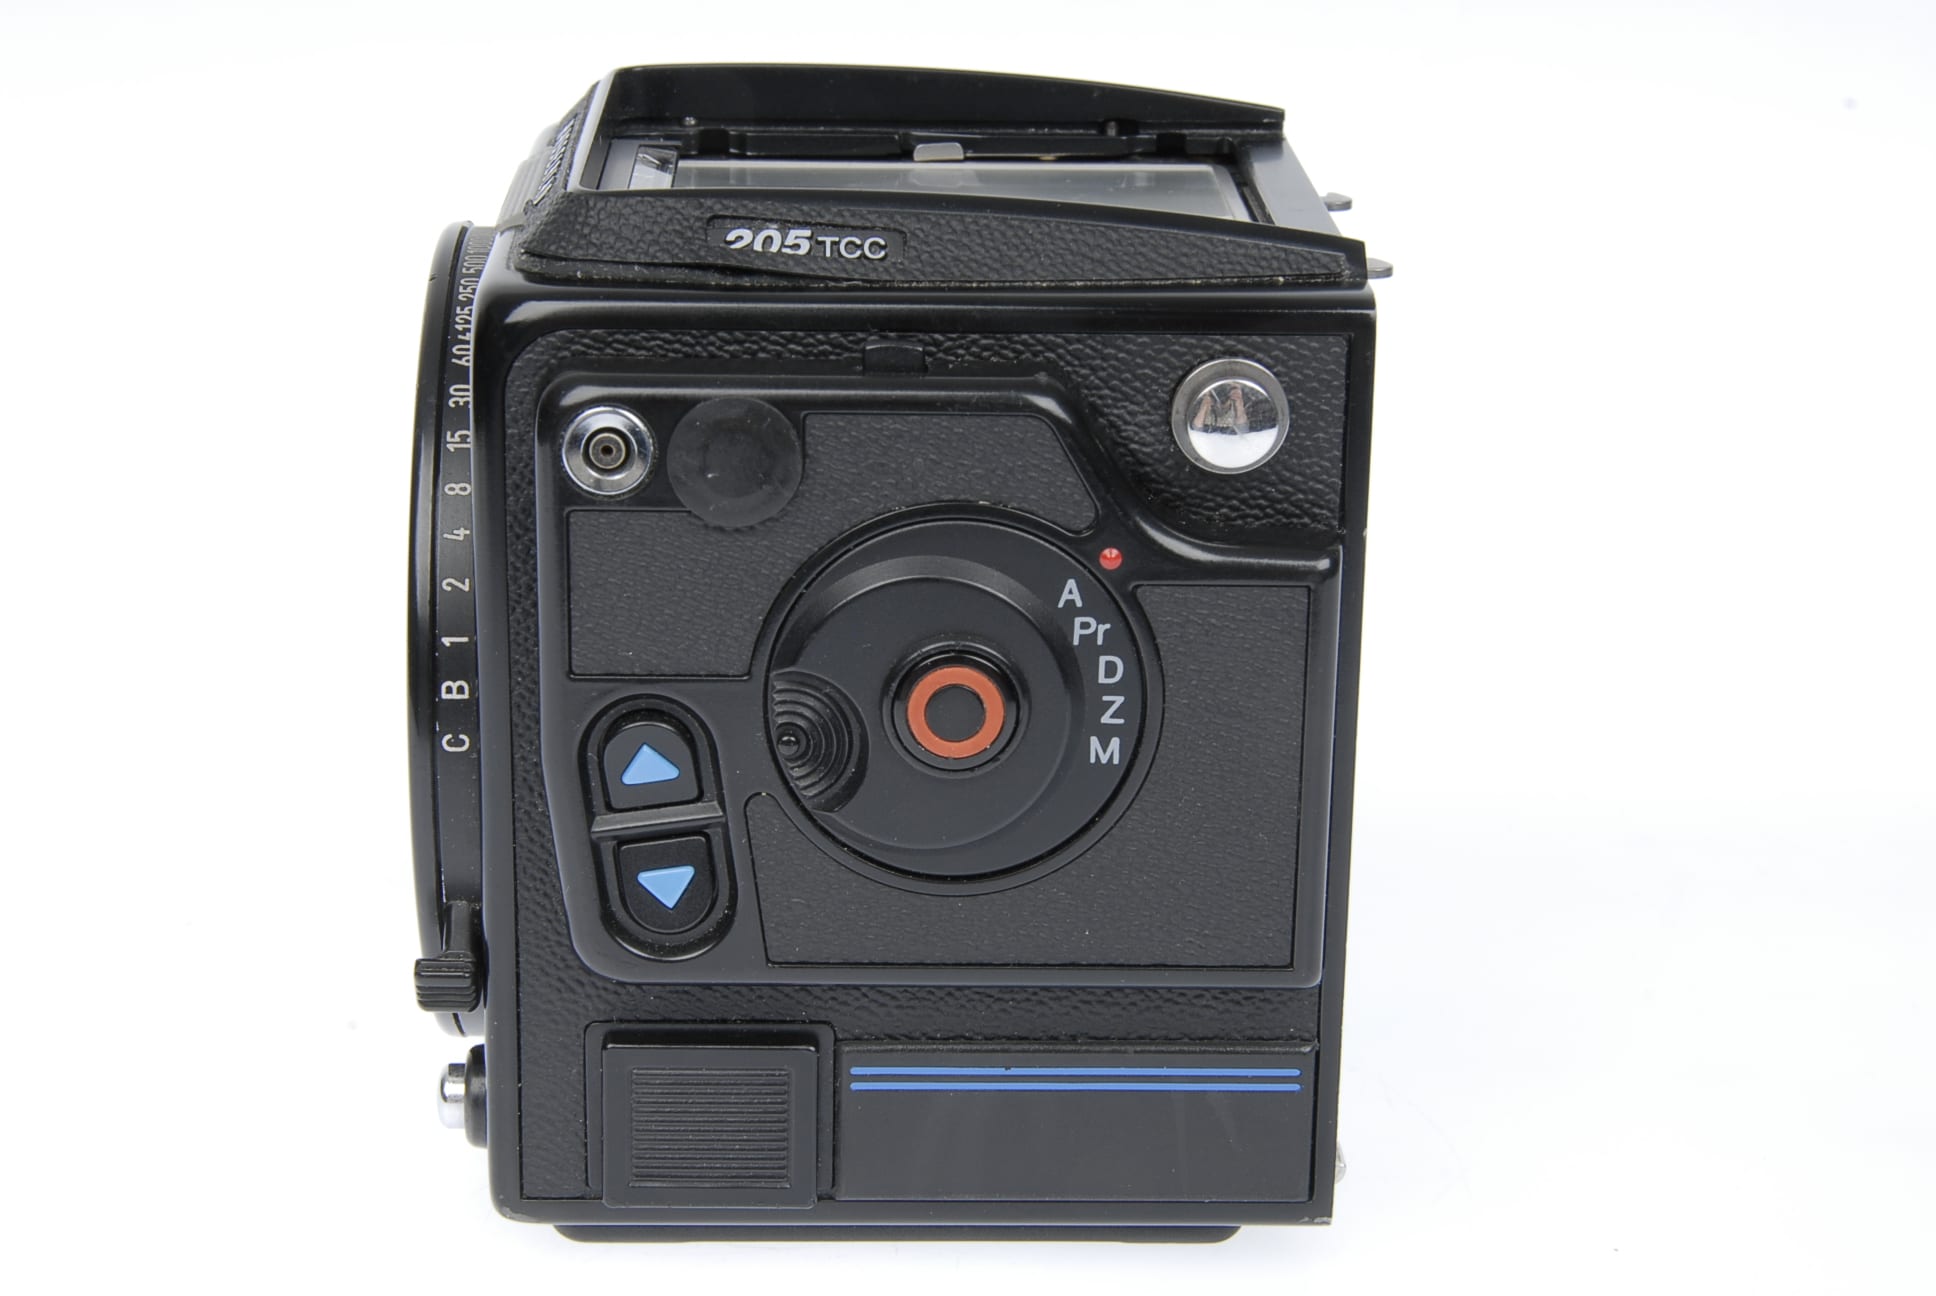
The 2000FC and FC/M camera bodies contain a shutters, just like a traditional 35mm SLR. This is a focal plane shutter and made of delicate titanium. They are exceedingly complex and there are no spare parts available. As a result, these cameras are both troublesome and virtually impossible to get repaired.
[/fusion_text][one_half last=”no” spacing=”yes” center_content=”no” hide_on_mobile=”no” background_color=”” background_image=”” background_repeat=”no-repeat” background_position=”left top” border_position=”all” border_size=”0px” border_color=”” border_style=”” padding=”” margin_top=”” margin_bottom=”” animation_type=”” animation_direction=”” animation_speed=”0.1″ class=”” id=””][imageframe lightbox=”no” lightbox_image=”” style_type=”none” hover_type=”none” bordercolor=”” bordersize=”0px” borderradius=”0″ stylecolor=”” align=”center” link=”” linktarget=”_self” animation_type=”0″ animation_direction=”down” animation_speed=”0.1″ hide_on_mobile=”no” class=”” id=””]  [/imageframe][/one_half][one_half last=”yes” spacing=”yes” center_content=”no” hide_on_mobile=”no” background_color=”” background_image=”” background_repeat=”no-repeat” background_position=”left top” border_position=”all” border_size=”0px” border_color=”” border_style=”” padding=”” margin_top=”” margin_bottom=”” animation_type=”” animation_direction=”” animation_speed=”0.1″ class=”” id=””][fusionslider name=”body_205tcc” class=”” id=””][/fusionslider][/one_half][one_half last=”no” spacing=”yes” center_content=”no” hide_on_mobile=”no” background_color=”” background_image=”” background_repeat=”no-repeat” background_position=”left top” border_position=”all” border_size=”0px” border_color=”” border_style=”” padding=”” margin_top=”” margin_bottom=”” animation_type=”” animation_direction=”” animation_speed=”0.1″ class=”” id=””][fusion_text]
503CX body in excellent condition.
[/fusion_text][/one_half][one_half last=”yes” spacing=”yes” center_content=”no” hide_on_mobile=”no” background_color=”” background_image=”” background_repeat=”no-repeat” background_position=”left top” border_position=”all” border_size=”0px” border_color=”” border_style=”” padding=”” margin_top=”” margin_bottom=”” animation_type=”” animation_direction=”” animation_speed=”0.1″ class=”” id=””][fusion_text]
205TCC body with focal plan shutter and shutter speed dial.
[/fusion_text][/one_half][fusion_text]
Extra Features
Later camera bodies introduced additional features. This are useful and maybe worth trying to get:
- Gliding Mirror System – changes to the mirror geometry so that there is no image cutoff with longer lenses.
- TTL/OTF flash – sensor within the camera that allows ‘through the lens, of the film’ flash measuring. Hugely useful if you will be using a flash with your camera.
- Optional motordrive – Provides an infra red remote control and automatic film advance is available for the 503CW. Operates at a modest 0.7 frames per second.
[/fusion_text][one_half last=”no” spacing=”yes” center_content=”no” hide_on_mobile=”no” background_color=”” background_image=”” background_repeat=”no-repeat” background_position=”left top” border_position=”all” border_size=”0px” border_color=”” border_style=”” padding=”” margin_top=”” margin_bottom=”” animation_type=”” animation_direction=”” animation_speed=”0.1″ class=”” id=””][imageframe lightbox=”no” lightbox_image=”” style_type=”none” hover_type=”none” bordercolor=”” bordersize=”0px” borderradius=”0″ stylecolor=”” align=”center” link=”” linktarget=”_self” animation_type=”0″ animation_direction=”down” animation_speed=”0.1″ hide_on_mobile=”no” class=”” id=””]  [/imageframe][/one_half][one_half last=”yes” spacing=”yes” center_content=”no” hide_on_mobile=”no” background_color=”” background_image=”” background_repeat=”no-repeat” background_position=”left top” border_position=”all” border_size=”0px” border_color=”” border_style=”” padding=”” margin_top=”” margin_bottom=”” animation_type=”” animation_direction=”” animation_speed=”0.1″ class=”” id=””][imageframe lightbox=”no” lightbox_image=”” style_type=”none” hover_type=”none” bordercolor=”” bordersize=”0px” borderradius=”0″ stylecolor=”” align=”center” link=”” linktarget=”_self” animation_type=”0″ animation_direction=”down” animation_speed=”0.1″ hide_on_mobile=”no” class=”” id=””]
  [/imageframe][/one_half][one_half last=”no” spacing=”yes” center_content=”no” hide_on_mobile=”no” background_color=”” background_image=”” background_repeat=”no-repeat” background_position=”left top” border_position=”all” border_size=”0px” border_color=”” border_style=”” padding=”” margin_top=”” margin_bottom=”” animation_type=”” animation_direction=”” animation_speed=”0.1″ class=”” id=””][fusion_text]
Power Winder for 503CXi and 503CW
[/fusion_text][/one_half][one_half last=”yes” spacing=”yes” center_content=”no” hide_on_mobile=”no” background_color=”” background_image=”” background_repeat=”no-repeat” background_position=”left top” border_position=”all” border_size=”0px” border_color=”” border_style=”” padding=”” margin_top=”” margin_bottom=”” animation_type=”” animation_direction=”” animation_speed=”0.1″ class=”” id=””][fusion_text]
Film speed control for a TTL/OTF flash
[/fusion_text][/one_half][fusion_text]
Focusing Screen
This often overlooked feature will have a huge impact on your experience of using the camera. After all, it is what you use when looking through the view finder to frame your subject and focus.
- Brightness – later viewing screens are much clearer and brighter. Especially when compared to an well worn early screen, the difference is pronounced and could be as much as two stops (four times the brightness). Hasseblad sold two types of improved screens, the ‘Acute Matte’ and ‘ Acute Matte D’, though they were in fact manufactured for Hasselblad by Minolta. The brightness levels of the two later screens is very similar.
[/fusion_text][one_half last=”no” spacing=”yes” center_content=”no” hide_on_mobile=”no” background_color=”” background_image=”” background_repeat=”no-repeat” background_position=”left top” border_position=”all” border_size=”0px” border_color=”” border_style=”” padding=”” margin_top=”” margin_bottom=”” animation_type=”” animation_direction=”” animation_speed=”0.1″ class=”” id=””][imageframe lightbox=”no” lightbox_image=”” style_type=”none” hover_type=”none” bordercolor=”” bordersize=”0px” borderradius=”0″ stylecolor=”” align=”center” link=”” linktarget=”_self” animation_type=”0″ animation_direction=”down” animation_speed=”0.1″ hide_on_mobile=”no” class=”” id=””]  [/imageframe][fusion_text]
Standard Focusing Screen
[/fusion_text][/one_half][one_half last=”yes” spacing=”yes” center_content=”no” hide_on_mobile=”no” background_color=”” background_image=”” background_repeat=”no-repeat” background_position=”left top” border_position=”all” border_size=”0px” border_color=”” border_style=”” padding=”” margin_top=”” margin_bottom=”” animation_type=”” animation_direction=”” animation_speed=”0.1″ class=”” id=””][imageframe lightbox=”no” lightbox_image=”” style_type=”none” hover_type=”none” bordercolor=”” bordersize=”0px” borderradius=”0″ stylecolor=”” align=”center” link=”” linktarget=”_self” animation_type=”0″ animation_direction=”down” animation_speed=”0.1″ hide_on_mobile=”no” class=”” id=””]  [/imageframe][fusion_text]
Acute Matte D Focusing Screen
[/fusion_text][/one_half][fusion_text]
- Focusing aids – medium format cameras offer huge resolution and have modest depths of field. This makes accurate focusing critical. Many of the viewing screens have built in aids to assist with focusing, such as a split image or micro-prism grid. Personally, we find one of these essential for accurate and consistent focusing.
- Grid – Leveling and adjusting the camera whilst using the reversed image in a waist level finder can be tricky. A viewing screen with a grid really helps with accurate composition.
[/fusion_text][one_half last=”no” spacing=”yes” center_content=”no” hide_on_mobile=”no” background_color=”” background_image=”” background_repeat=”no-repeat” background_position=”left top” border_position=”all” border_size=”0px” border_color=”” border_style=”” padding=”” margin_top=”” margin_bottom=”” animation_type=”” animation_direction=”” animation_speed=”0.1″ class=”” id=””][imageframe lightbox=”no” lightbox_image=”” style_type=”none” hover_type=”none” bordercolor=”” bordersize=”0px” borderradius=”0″ stylecolor=”” align=”center” link=”” linktarget=”_self” animation_type=”0″ animation_direction=”down” animation_speed=”0.1″ hide_on_mobile=”no” class=”” id=””]  [/imageframe][fusion_text]
Screen with Split Image Focusing Aid
[/fusion_text][/one_half][one_half last=”yes” spacing=”yes” center_content=”no” hide_on_mobile=”no” background_color=”” background_image=”” background_repeat=”no-repeat” background_position=”left top” border_position=”all” border_size=”0px” border_color=”” border_style=”” padding=”” margin_top=”” margin_bottom=”” animation_type=”” animation_direction=”” animation_speed=”0.1″ class=”” id=””][imageframe lightbox=”no” lightbox_image=”” style_type=”none” hover_type=”none” bordercolor=”” bordersize=”0px” borderradius=”0″ stylecolor=”” align=”center” link=”” linktarget=”_self” animation_type=”0″ animation_direction=”down” animation_speed=”0.1″ hide_on_mobile=”no” class=”” id=””]  [/imageframe][fusion_text]
Screen with Grid and Focusing Aid
[/fusion_text][/one_half]